How to Replace Textures
The following instructions depend on if you are using a release version (pre-compiled) or building the project from source.
If you're looking to create your own texture packs, see the Developing > Texture Packs page for more info.
Using the OpenGOAL Launcher
Using a proper bundle
If the texture pack has been bundled into a valid .zip file, you can let the launcher install the pack for you.
First open the texture pack page:

Next add your zip file, if it is in a valid format it should add successfully:
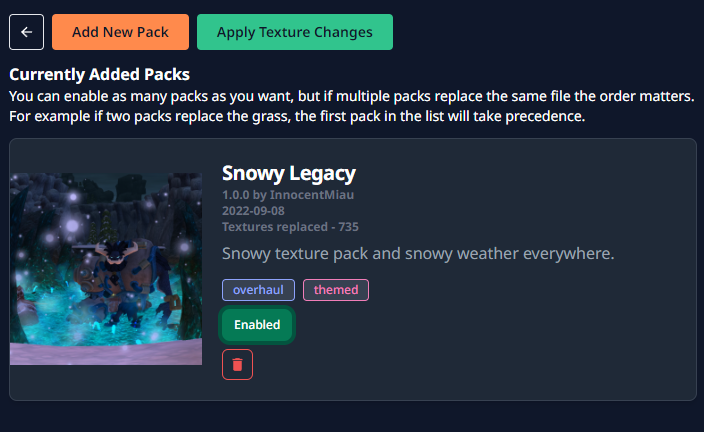
Next you'll want to enable the pack and apply the changes, and that should be it!
Manually
Anytime you see <GAME> it is a placeholder text that you need to replace with the specific game you are replacing textures for.
If you don't want to use this feature, or the texture pack is not in the correct format, you can apply texture replacements yourself manually.
Navigate to the folder that you set as the Installation Directory. You can find this in the settings page.
From there, you'll want to create a custom_assets/<GAME>/texture_replacements/ folder in the following directory:
<INSTALLATION_DIRECTORY>/active/<GAME>/data
And copy your texture replacements into it.
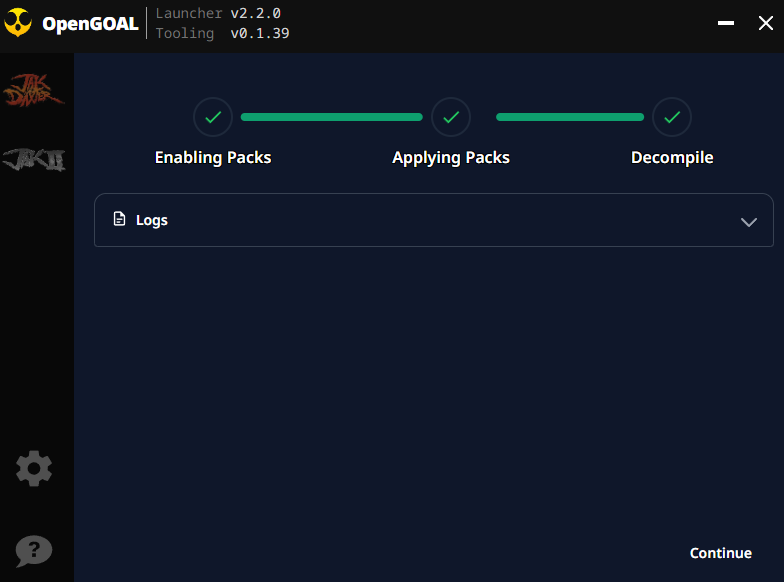
Once this is done, you'll need to Decompile the game:
Using a Release build
Create a folder called texture_replacements inside the data/custom_assets/<GAME>/ directory. The directory structure should be
data/custom_assets/<GAME>/texture_replacements/page_name/texture_name.png
Where page_name is the name of the folder in data/decompiler_out/jak1/textures and texture_name.png is the name of the texture.
From source
Textures to be replaced should be saved in
jak-project/custom_assets/<GAME>/texture_replacements/page_name/texture_name.png
Where page_name is the name of the folder in decompiler_out/jak1/textures and texture_name.png is the name of the texture.
You'll have to create the texture_replacements folder yourself.
In older releases, you'll need to leave out the custom_assets/<GAME> portion of the path - e.g. data/texture_replacements/page_name/texture_name.png instead of data/custom_assets/<GAME>/texture_replacements/page_name/texture_name.png